The magazine is the most trusted source for building services in Grenada and a must for all potential homeowners to assist them in building better and safer homes. Our experienced editorial team have worked for many years in the construction sector.

www.buildgrenada.com


The Builder's Guide
The magazine is the most trusted source for building services in Grenada and a must for all potential homeowners to assist them in building better and safer homes. Our experienced editorial team have worked for many years in the construction sector.
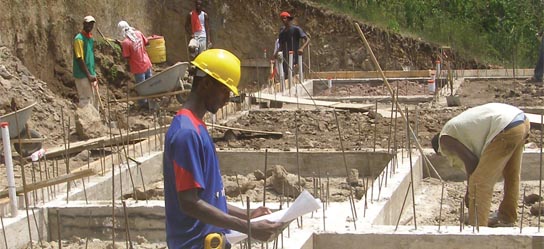
You can’t afford to be complacent about the setting out of foundations, getting it wrong is all too easy, this means extra cost for you right from the outset. It doesn’t just matter to you that the first steps are correct, it matters to the local planning authority that the home is built in the position shown on the approved plans. The distances to boundaries and the levels are both important from a planning aspect, because of the issues of overlooking and over shading neighbouring buildings. Your building contractor is the only person who will check the setting out at the start. With pegs driven into the corners, chalk lines sprayed on the ground between them for foundation trenches. The centre lines of the foundations are marked to avoid confusion; the wall positions will be set out with pegs and string lines later when the foundations have been concreted.
Ground-bearing floors
The site stripped clear of topsoil and vegetation before the foundations is dug. It’s from this reduced level the infill construction begins. The ground must be properly prepared with an over site treatment. Hardcore is used in a layer, at least 150mm thick, but no greater than 600mm, in selected aggregate. It’s then compacted down in layers with a plate compactor. If this task is done incorrectly, settlement is to be expected, causing the floor slab to crack. On sloping sites, where part of the over site may exceed 600mm deep, it may be acceptable to use lean-mix concrete in layers with the hardcore to make up the difference. Polythene is used for the damp-proof membrane; make sure it is dressed up over the walls so it can be lapped with the damp-proof course later.
Trench foundation
Trench filled foundation avoids block work below ground. The concrete is poured to within 150mm of the surface ground level, saving time and trouble. The sides of the trench play as much a part in supporting the load as the bottom, and so this foundation must only be used on stable (clay and chalk soils) ground, where the trench sides are firm and capable of bearing loads is ideal for trench fill foundations.
Strip foundations
Usually wider, strip foundations use less concrete by being thinner. They’re typically 300mm thick. The exact thickness will need to be determined by the masonry courses of the walls up to damp-proof course. If you have a sloping site, you will need to step the foundations to keep them level. Steps should overlap at least the width of the trench when concreted and that means shuttering across them. Strip foundations are often necessary in softer soils, such as sand, since they spread the load of the building out over a greater area.
Depth
Foundations formed in rock and stony grounds can often be shallower than those dug in “shrinkable” soils such as clay. In the latter, at least 1m deep is normal, nearby trees or shrubs may extend this depth to a good deal more? Once the trenches have been dug and inspected, pegs are then hammer into the sides to mark the level for the concrete
Concreting
The hard work is in raking it out and tamping it into level using a straight length of timber that will span the distance between the walls on either side. Tamping the concrete helps to consolidate it in the same way that vibrating it does and, combined with a gentle sawing and tapping motion will bring the surface to the level and finish needed.
Drainage
Levels are just as critical when laying the drainage system. The invert level is the bottom of the pipe and from this point the system falls are determined. The trenches need to be carefully dug to the right depth and gradient to avoid huge amounts of bedding being necessary to support the pipes. Gravel is used to a depth of 100mm to 200mm thick for both bedding and surround material supporting and protecting the pipes at the correct fall. Gradient of 1:40 is ideal, but plastic drains will tolerate much shallower falls if it’s necessary. Look for at least half a bubble out on the spirit level and make sure they fall the right way. Eyes can be deceived when looking at drains in trenches, particularly when the ground slopes the other way.
Drains testing
For peace of mind, a water or air pressure test should be carried out before drains are backfilled to ensure all the joints are watertight and everything works. Your building control officer may want to witness the test at this stage or when work is complete. The reason for the latter is that drains can become displaced or damaged with careless backfilling and site traffic. Drainage connections are usually best left until later, but if you do connect up at this stage to the mains system, make sure you fit manhole covers and fill gulley traps with water.
Services
Using deep drainage trenches for running in other services makes good sense. Gas, electric and water cables all have to be provided at your expense, so laying them in position now will save time and money later. Getting the supply companies to connect them when the house is complete can be a slow procedure, so get the job registered, priced and booked in well ahead to avoid delays later.
The Builder's Guide
The magazine is the most trusted source for building services in Grenada and a must for all potential homeowners to assist them in building better and safer homes. Our experienced editorial team have worked for many years in the construction sector. US$38.95
Features of a well designed kitchen
Construction Plans & Specifications
Architecture of the Next Generation
Navigate
© Buildgrenada.com All rights reserved.
Site by


